
Tools7 min read22 min video
Time Scale, ripple edit, shot colours and a whole new UI.
Maya 2027: The Sequencer Update Maya Animation Needed
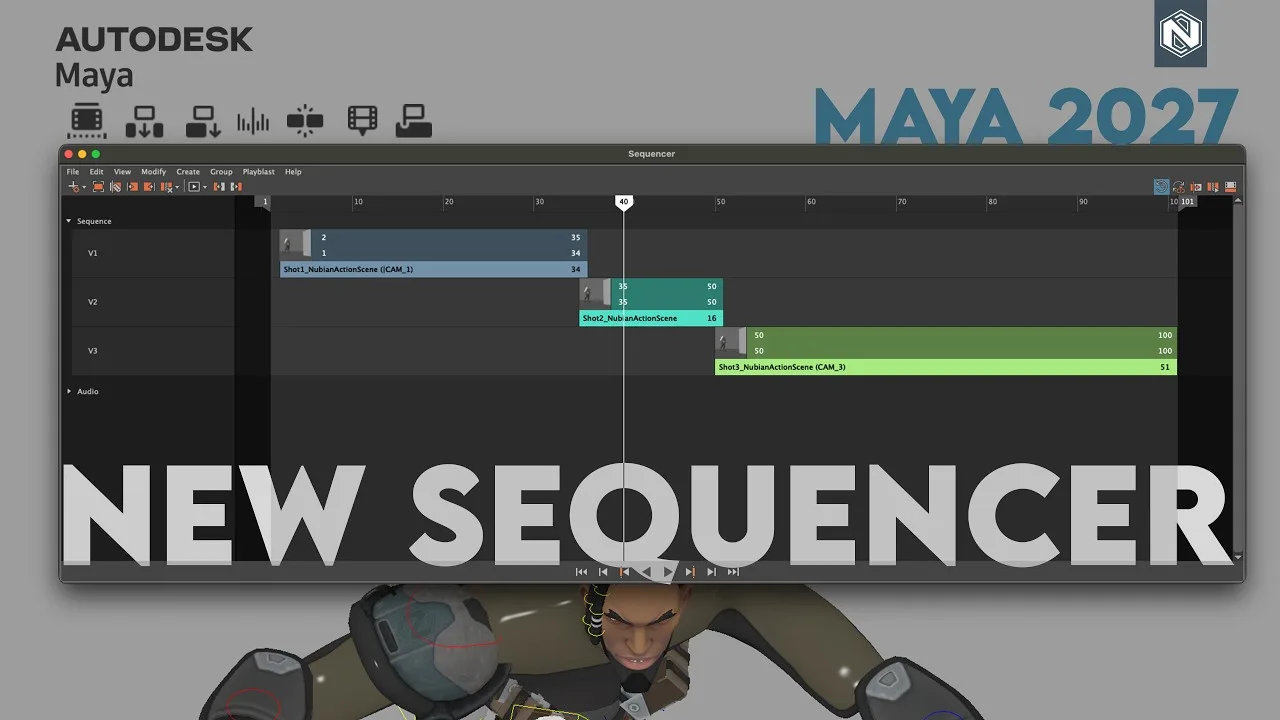
Key takeaways
- The Maya Sequencer has been around for years, mostly used by VFX and film teams. Maya 2027 gives it the revamp it needed.
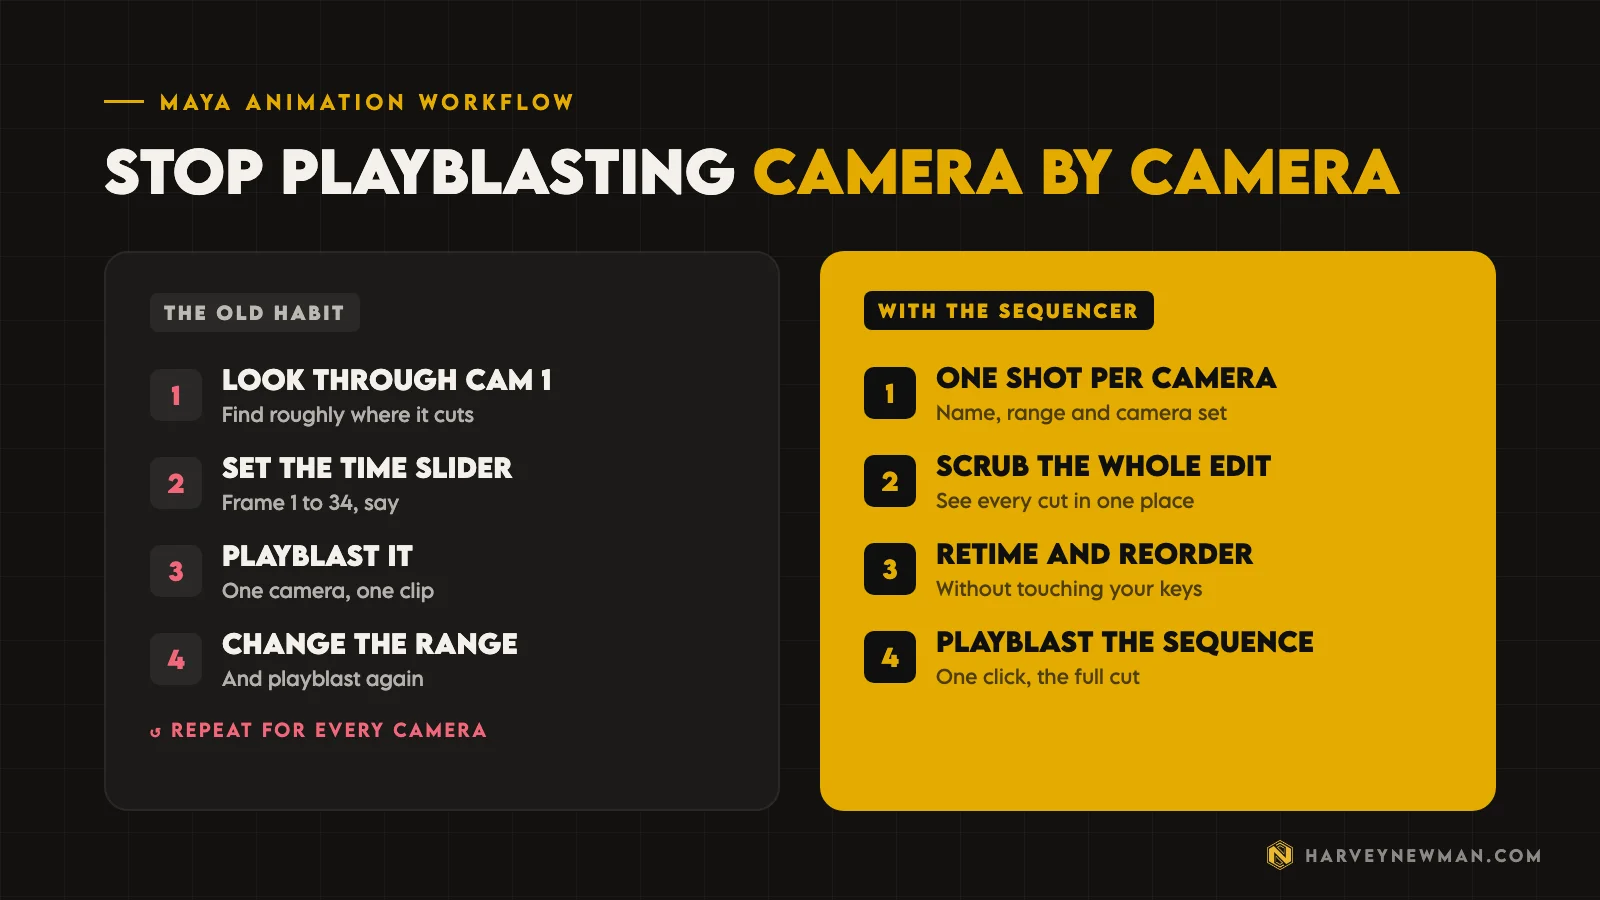
- Instead of playblasting camera by camera, you build one shot per camera and see the whole cut in one place.
- Time Scale lets you slow a shot down in the Sequencer without changing a single key in your animation.
- Shot colours, labels and custom thumbnails keep big sequences readable, and ripple edit keeps your shots together.
- You can playblast a selected shot, all the shots on a track, or the whole sequence. Lock your cameras first.
A few weeks before this video, I made a Maya 2027 first look about MotionMaker and its horse demo. I also teased the Sequencer, because it’s been revamped and there’s a lot to talk about. This is that walkthrough: what’s new for Maya animation in the Maya 2027 Sequencer, and how I’d use it.
Autodesk sponsored the video. All the thoughts here are my own, and they saw the video when you did.
Why the Maya Sequencer needed a revamp
If you’re an animator, you may never have opened the Sequencer. It’s been in Maya for a long time, but it’s mostly used by the VFX and film industry.
It needed a revamp for years. The features were basic, and it didn’t do much of what we’ve got used to over time. Even the newer Maya features for the time slider never made it into the Sequencer.
The tool was overdue for an update for quite a while. This is why I’m so hyped about this.
How animators usually cut shots in Maya
For the demo I used a scene from my Motion Capture for Games course: a character stepping up and climbing onto a platform. The data still needs cleaning up, because in the course that’s what students do with it. Here I wanted a small three camera cut.
So I made three cameras:
- cam1: a static down shot of him going up.
- cam2: him grabbing the ledge and starting to climb, up to about frame 54.
- cam3: a side shot where he climbs up and stands.
If you’re an animator who doesn’t use the Sequencer, here’s what you normally do. You look through cam1, set your time slider to the frames you need, say frame 1 to 34, and playblast. Then you change the range and playblast again. And so on, camera by camera.
I don’t think that’s the best way to do it. That’s why the Sequencer exists.
How to use the Sequencer in Maya 2027
Go to Windows › Animation Editors › Sequencer. It’s highlighted in the menu like other new features.
There are a few ways to add a shot. The quickest: anything highlighted in your time slider goes straight into the Sequencer. Right-click, choose to create a shot from the time slider, and it picks up the range immediately. Press play and the shot loops in place.
In a professional setting I’d use Create Shot from Options instead. There you can:
- Name the shot, for example “Shot1_NubianActionScene”.
- Set the start and end frame, 1 to 34 for the first one.
- Choose the shot camera, so you know it’s cam1 and not something you nudged.
- Set the shot placement to the current frame.
- Add an image for that shot, which is one of the new options.
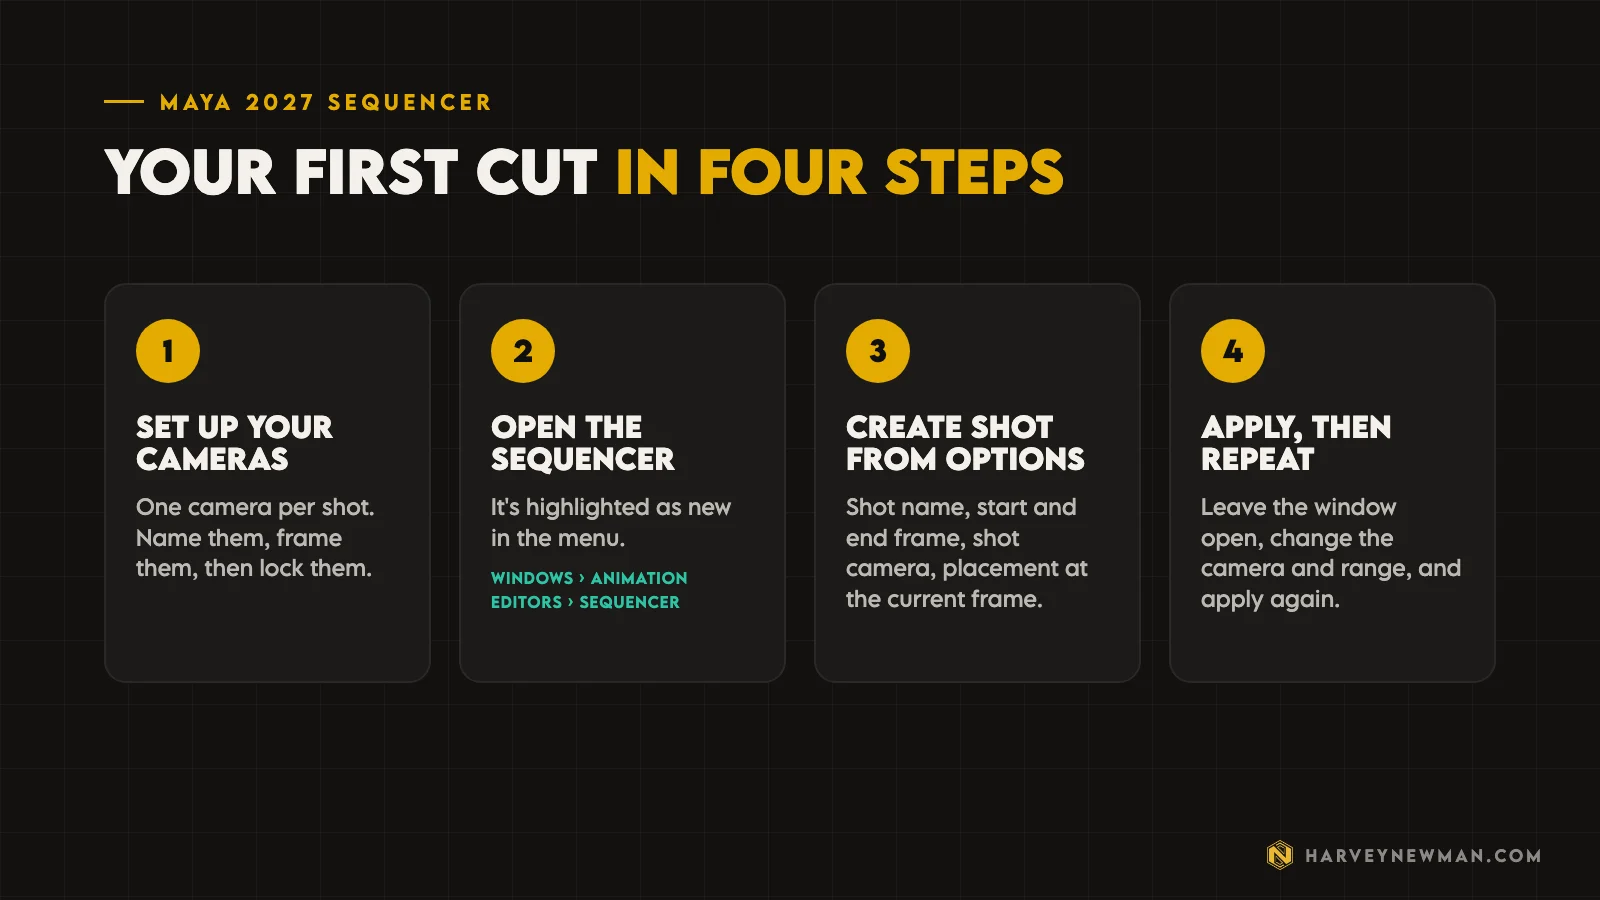
The best part is that you can leave that window open. Move your timeline, change the shot name, switch to cam2, set frames 35 to 50, apply. Then cam3, frames 50 to 100, apply. That’s the most efficient way I’ve found to add multiple shots. Scrub the Sequencer and you see every transition in one place.
What’s new in the Maya 2027 Sequencer UI?
The first thing you notice is the UI. The window is completely new, it looks far better, and it handles more for you automatically, like keeping your time ranges correct.
If you’ve ever edited video, you’ll pick it up quickly. You can cut your clip, split a shot, trim before or after the shot, and you have playblast options.
How to playblast a sequence in Maya
Right-click any shot and choose to playblast it. The options are the same ones you’ve probably already set up for your timeline, so the result matches what you’re used to.
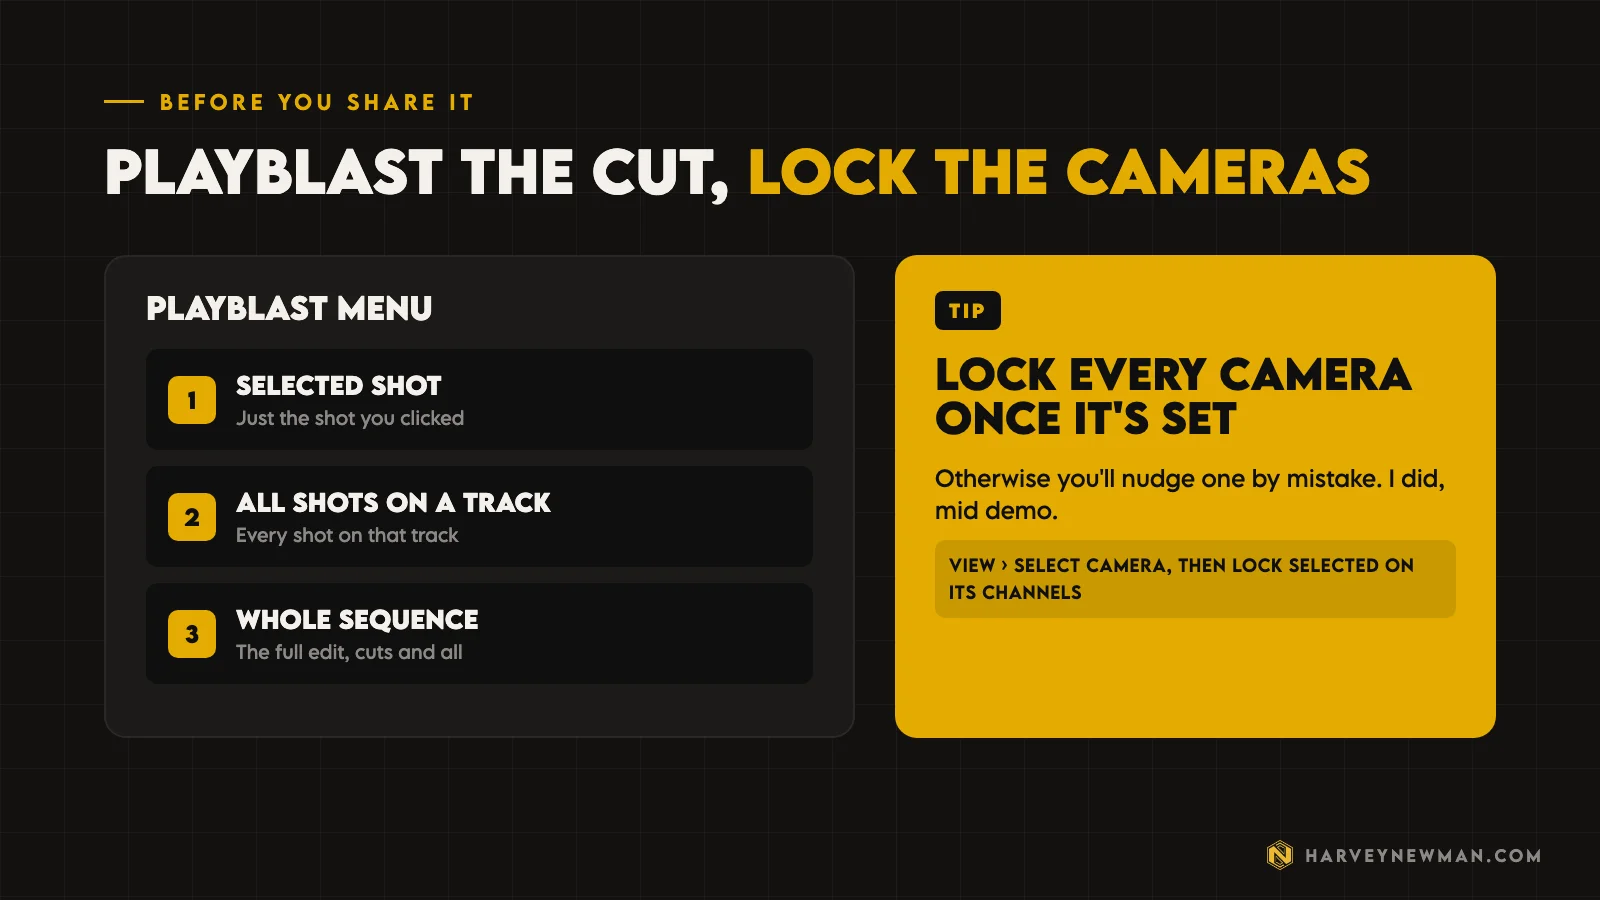
The new Playblast menu goes further. You can playblast:
- Selected shotJust the shot you've clicked on.
- All shots on a trackEvery shot on that track, each as its own clip.
- Whole sequenceThe full edit with all the cuts, in one video.
I didn’t set my camera up for widescreen or add any viewport overlays, but you get the idea.
One tip, because I made this mistake during the demo: once your cameras are set up correctly, lock them. Select the camera, then lock its channels with Lock Selected. Do it for every camera, so you don’t nudge one by accident like I did.
Shot colours, labels and thumbnails
Before, a complex scene with lots of shots could get out of hand fast. The new organisation tools help a ton.
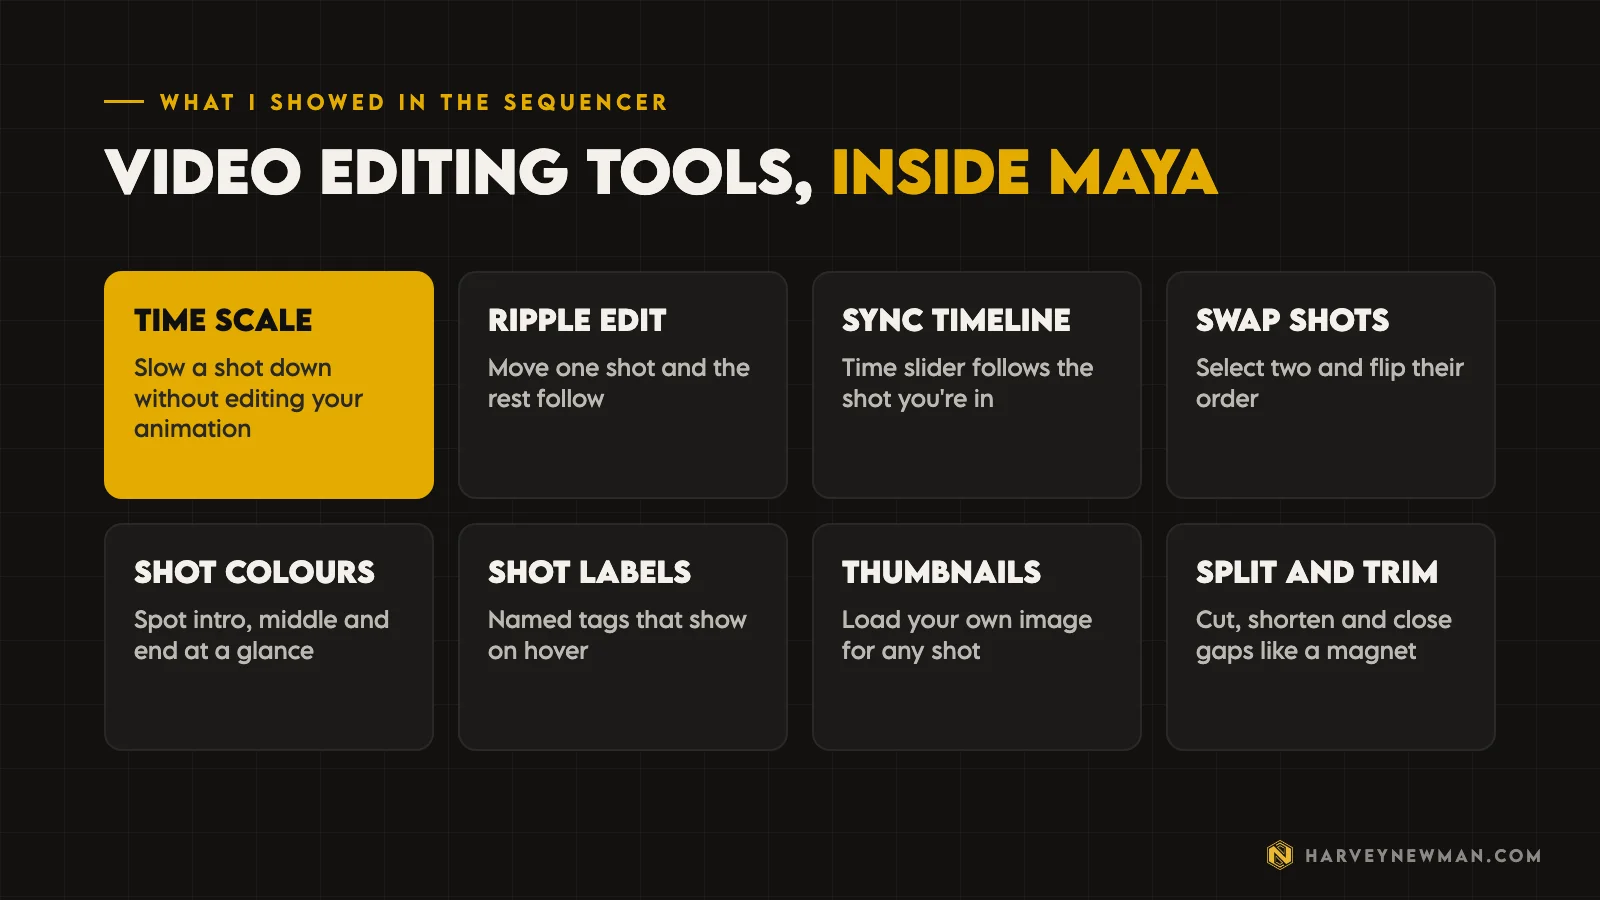
- Shot colours. Say you have an intro, a middle and an end, with 50 different takes or cameras. Colour the intro red, the middle light blue and the end green, and you can see where you are from a distance. Anyone who has edited video knows how messy overlapping clips get.
- Shot labels. Create a label, give it a name and a colour, and assign it to shots. Hover over a clip and the label name shows up.
- Custom thumbnails. Take a screenshot, load it as a thumbnail on any shot, and it displays at the start of that shot.
- Track height. Switch between thin, medium and larger shots, which helps when you have many sequences stacked up.
Split, trim and swap shots
Split cuts one shot into two. Trimming makes a shot longer or shorter. There’s also a button to remove the gaps between shots, which snaps them together like a magnet tool.
The one at the end I find especially useful: swap shots. Sometimes you set a camera up, then want to swap one shot for another. Often you’d recreate the shot or shuffle clips around one by one. Now you select two clips and swap them.
How does sync timeline work?
So far, checking the sequence meant moving the Sequencer’s timeline, which also moves your main timeline. That might suit you. Often I animate in the main timeline, then jump into the Sequencer to preview the cutscene, then go back.
If that’s not how you work, turn on sync timeline. As you scrub through the first shot, your time slider shows frames 1 to 34. Move into the next shot and it shows 35 to 50. You can still tweak each shot against your timeline as you scrub.
Time Scale: slow motion in Maya animation
This is my favourite. Every animator goes through the phase of wondering what their animation would look like in slow motion: a punch, a jump, whatever it is.
Turn on Time Scale Mode, select a shot and drag its edge to stretch it. A little clock icon tells you you’re scaling, and a note gets added to the shot automatically. Hover over it and it tells you how much the shot has been scaled. Mine said 153%.
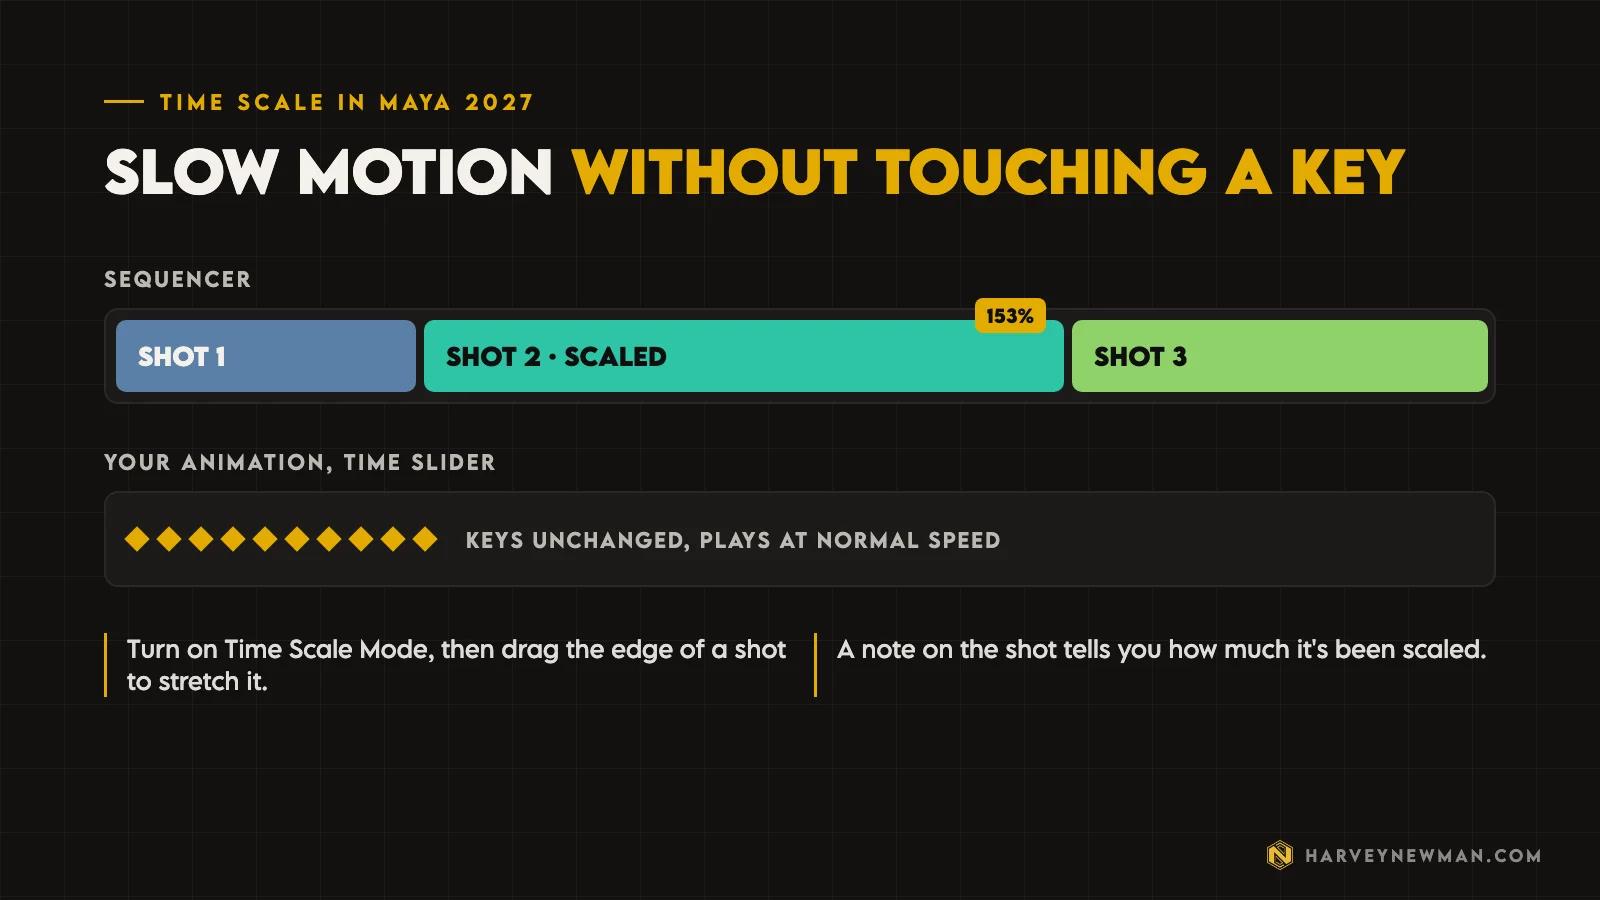
It’s exactly how slow motion works in a video editor: you scale up the footage. Now you can do the same inside Maya.
The important part: your animation hasn’t changed. Play it on the main timeline without sync and it runs at regular speed. It only slows down when you play it through the Sequencer.
There's no better way of slowing down your animations than this. I love this tool.
Harvey Newman
What is ripple edit in the Maya Sequencer?
Ripple edit is small but important. Normally your clips move individually, so you can open up or close the gaps between them. With ripple edit on, moving a shot moves everything after it, and the frame ranges update to match.
You can combine it with Time Scale. Stretch a shot for slow motion with ripple edit on, and every shot after it shifts along, so your shots always stay together. I’d use it once you’re happy with the order and won’t be moving shots around any more.
Is the Maya 2027 Sequencer worth it?
For Maya 2027 and Maya animation in general, I think these tools add a bit of pizzazz for any animator who fancies putting a cutscene together, or cutting shots in an interesting way with some flexibility.
My editor Connor edits my videos now, but back when I edited them myself, I remember wishing the Sequencer had these features. What you’re doing there is video editing inside Maya.
We can always have more features, but this is absolutely heading in the right direction.
Harvey Newman
If you want more Sequencer content, the Maya Learning Channel on YouTube has plenty. And if you want to see where Autodesk’s other animation tools are going, I’ve also written about Autodesk Flow Studio. For a different angle on the tools we pay for, there’s my piece on Blender funding and the Blender vs Maya money gap.
Have you used the Sequencer in your Maya animation work, or is this the update that gets you to try it? Come and tell me in the comments on the video.
The video
Watch the full breakdown
- 0:00Maya 2027 Sequencer update
- 0:43Why the Sequencer needed a revamp
- 1:33Setting up cameras for the demo scene
- 4:42How to use the Sequencer in Maya 2027
- 7:28What's new in the Sequencer UI
- 12:34Shot colours, labels and thumbnails
- 14:00Split, trim and swap shots
- 15:51Sync timeline
- 16:53Time Scale: slow motion in the Sequencer
- 19:13Ripple edit
- 20:28Final thoughts
Questions people ask
What's new in the Maya 2027 Sequencer?
A redesigned UI, Time Scale Mode for retiming shots, shot colours, shot labels, custom thumbnails, and expanded playblast options. In the video I also show split, trim, swap shots, sync timeline and ripple edit.
How do I open the Sequencer in Maya 2027?
Go to Windows, Animation Editors, Sequencer. Select the camera you want to look through, then use Create Shot from Options to set the shot name, frame range and camera.
How do you do slow motion in the Maya Sequencer?
Turn on Time Scale Mode in the Sequencer toolbar and drag the edge of a shot to stretch it. The shot plays slower in the Sequencer, while your animation on the time slider stays exactly as it was.
Can you playblast a whole sequence in Maya?
Yes. The Sequencer's Playblast menu lets you playblast a selected shot, all the shots on a track, or the entire sequence as one video.
Is the Maya Sequencer only for VFX and film?
That's where it has mostly been used, and many game animators have never touched it. With the 2027 update, it's worth it for anyone putting a cutscene or a few camera cuts together.
And remember,
there are no shortcuts for animation.
 Stay well, stay safe,Harvey NewmanBook a free call →
 Looking for knowledge?How to Thrive in the Games Industry: The Long GameMy book on building a career in games and keeping it. CRC Press, 246 pages.Get the book →
 Looking for resources?Rigs, courses and mentors on AnimworksFree and paid rigs, courses from working pros, one to one mentoring and mocap packs.Visit anim.works →
 Autodesk Flow Studio: AI Motion Capture for Game Developers6 Mar 2026
 Mastering Motion Capture for Games: Advanced Techniques and Tools From AAA12 Nov 2024
 The Game Animation Pipeline: How I Build One, AAA or Indie12 Jun 2026
 Blender Funding: Only 1 in 200 Users Pays Anything11 Sept 2026